


Strawberry and Lemon Marmalade
Adapted from Blue Chair Jam Cookbook by Rachel Saunders (Andrews McMeel Publishing, 2010)
While strawberries are thought of as a spring and summer fruit, they’re in season here during winter, too. “S...

One of the special aspects of our local food scene is that there’s an abundance and variety of citrus available year-round. So what do you do when life gives you lemons—and blood oranges, tangerines and limes—this season?
Make marmalade.
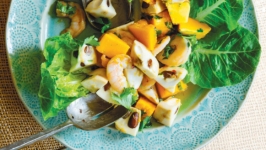
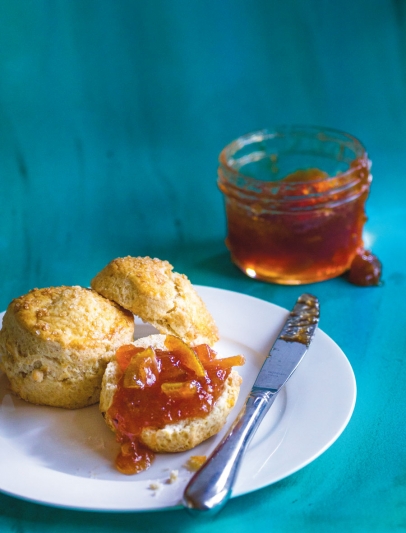
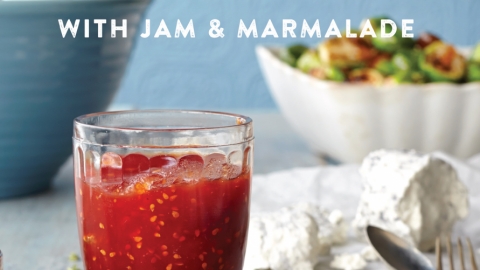
Wake up breakfast with a slather on toast or a scone, or mix it with butter and seasonings to flavor roast chicken, the way Rachel Saunders does in Blue Chair Cooks with Jam & Marmalade (Andrews McMeel Publishing, 2014) (See at left for the recipe).
Marmalade also makes a great homemade holiday gift, which is why Santa Paula resident Greta Strautman started making it five years ago. “It was a way to make something out of love and to give it to other people,” she says. Now Strautman is launching Little Apple Kitchen to sell her homemade jams and marmalades.
Perhaps you have a notion of marmalade as a fussy, bitter, overpriced import from across the pond. That was my experience, until I was enlightened by a class at the Ojai Valley Grange.
In two hours, Strautman showed a handful of students how to transform lemons, oranges and strawberries (and a hefty dose of sugar) into edible sunshine. I had never made marmalade before, and it looked like alchemy. But with the help of a few tips and the right recipes it’s surprisingly achievable.
Turns out, marmalade is an excellent project for beginners, even those who have never before made jam or canned anything.
Canning marmalade is simpler than other food preservation projects because citrus is so acidic it does not easily spoil. No special tools are required other than some canning jars with new lids, a good-sized cooking pot and a ladle. Other equipment that is handy, but not absolutely necessary, includes a wide-mouthed funnel to cut down on drips and spills as you spoon marmalade into jars and a magnetic lid lifter to help place the hot, sterile lids on top.
Shop for citrus at farmers’ markets and local grocers (see sidebar for what varieties are in season now, much of it locally grown). If you’re lucky, you can look even closer to home: Strautman confesses she rarely buys citrus because there is usually a friend or neighbor with a fruitful tree willing to share.
Let’s talk about bitterness, the Achilles’ heel of would-be marmalade makers. Marmalade uses the whole citrus, everything but the seeds, which makes it an economical product with no food waste. But that also means you have to deal with the pith—the white layer between the fruit segments and the peel—which can be very bitter. Some traditional marmalade recipes require soaking the chopped fruit in water for two or three days to extract the bitterness and create a delicate, balanced flavor.
Happily for us, there are work-arounds to the time and bitterness issues. The recipes on pages 17 and 18, adapted from what we created at the Grange, can be accomplished in about two hours. One of them requires a couple of steps the day before so the fruit can mellow in a bowl overnight.
I came away from the class inspired. More marmalade is definitely in my future.
Preparing the Fruit
How you do this first step depends on your recipe, but here are a few ideas to make it easier.
Because you’ll use the peel of the fruit, make sure you clean it well. If you are using conventionally grown produce, you should use hot water and scrub the citrus peel gently with a vegetable wash to get rid of any wax and pesticides.
When cutting the fruit, consider the texture you want in your final product: Would you prefer long, thin shreds of citrus zest or short, thicker pieces? As you slice, remember to remove all the seeds; you don’t want them in your marmalade.
Some recipes, including the Blood Orange and Meyer Lemon recipe (on page 18), require the zest (colored part of the peel) and the pulp of the fruit, but not the white pith. This allows the whole process to proceed more quickly, since you don’t have to mitigate the bitterness of the pith.
For recipes that call for removing the pith, first use a zester or vegetable peeler to take off the thinnest possible layer of zest. (If you use a peeler, you might need to cut away some pith.) You can then shred or slice it as fine or chunky as you fancy. Next, score the surface of the pith from top to bottom, forming wedges, and peel it away, leaving just the juicy fruit underneath. Then chop the fruit for your marmalade, remembering to remove all seeds. (If you are planning to make other jams, the discarded pith can be used to make a natural pectin.)
Each recipe will specify how to finish preparing the fruit. Make sure you read ahead, in case some steps need to be done in advance.
Preparing the Jars
The simplest way to sterilize your jars is in the oven. Preheat oven to 250°. Place washed and dried jars on a baking sheet, and put them in the oven for at least 30 minutes. You might put in a few extra, just in case. Take them out just when you are ready to fill them.
Cooking
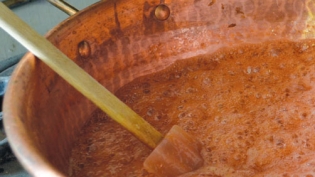
If you have ever made jelly or jam, the process here is very similar. If not, no need to worry. The cooking process has three stages. First, combine the fruit, water and sugar according to your recipe and cook on high heat, stirring regularly to help the sugar dissolve. (Adding the sugar too soon can create a burned, caramelized flavor.)
After it boils for a few minutes, it will start to foam. The magic is happening. Finally, as the liquid cooks down a bit and thickens, it will become darker and the bubbles will be shiny and small. Turn down the heat at this point and test to see if it’s done.
Testing Doneness
The freezer test is the easiest way to see if your marmalade is done. Before you begin making your marmalade, put several metal spoons or, even better, a metal plate in the freezer.
When your marmalade starts to get darker with small, shiny bubbles, put a small amount on the plate or spoon and put it back in the freezer. After five minutes, run your finger through the chilled marmalade.
If it’s done, it will “set up” or gel to a nice consistency. If it runs back together to cover the path of your finger, cook for a few more minutes and test again.
If the path stays clear, then lick your finger, turn off the heat and get ready to start putting your marmalade in jars.
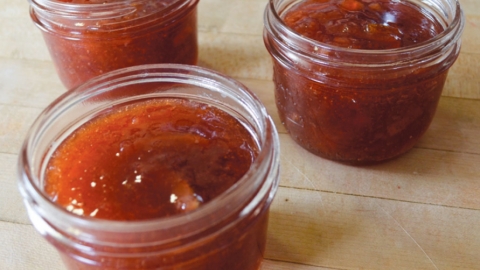
Canning
Be careful taking your hot jars and lids out of the oven. Here is where a canning funnel and magnetic lid lifter will come in handy to avoid messes and burned fingers. Place the funnel in a jar and carefully ladle your marmalade in, leaving a quarter-inch space at the top. (If the marmalade starts to bubble in the jar, let the jars cool for a few minutes before continuing.)
After filling the jars, wipe away any drips on the rims with a damp cloth, and place the hot lids carefully on top. Screw the rings on just tight enough to hold the lids in place; it’s the rubber on the lids that will seal up the jars, not the tightness of the rings.
Put the jars back on the baking sheet and back into the oven at 250° for another 15 minutes, then let them cool on the counter top. You’ll start to hear the lids pop as they cool—that means they are sealed up just right.
When they’re cool, gently press each lid. A sealed lid will be firm and slightly concave. If it pops in and out at all, it is not sealed. Not to worry—just put that jar in the fridge and use it first.
Remember to label and date all your jars. When properly sealed, it’s perfectly safe to unscrew the rings to put on a square of festive cloth or other decoration for gift-giving.
Adapted from Blue Chair Jam Cookbook by Rachel Saunders (Andrews McMeel Publishing, 2010)
While strawberries...

Adapted from Saving the Season: A Cook’s Guide to Home Canning, Pickling, and Preserving by Kevin West (Knopf, 2013...

Serves 3 to 4 This is the tenderest, moistest chicken I know. Use a really top-notch bird and roast it only...

Copyright ©2024 Edible Ojai & Ventura County. All rights reserved