Starting a Square-Foot Garden
Have you ever wanted a garden but thought you didn’t have enough room? Consider this square-foot garden approach. All you need is a sunny spot that can accommodate a four-by four-foot raised bed. Soon you’ll have 16 one-foot squares of vegetables to harvest all summer long!
BUILDING
The most common raised bed is a four-foot square made of wood, but you can also use railroad ties or concrete blocks. Use two-inch by four-inch (or two-inch by six- or eight-inch) wood planks to build the box—anything thinner than two inches and the planks will bend or buckle.
Preferably, the bed box should be set on bare ground to allow for proper water drainage. (You can also place it on concrete or asphalt, if necessary. In that case, make the box tall enough to allow for sufficient soil and proper root development.)
But first, dig as deeply as you can and loosen the soil where the box will sit. Set your box atop the prepared ground. If you have gophers, place a layer of chicken wire on the ground before installing the box.
If setting the box over reasonably good soil, you can make the sides eight to 12 inches tall; for asphalt or concrete positioning, make it 18 to 24 inches.
FILLING STATION
When your box is complete, you have a number of soil choices. I like to use a recipe of one part peat moss, one part vermiculite and two parts well-decomposed compost. Pour these into your box and mix thoroughly using a long-tined digging fork.
Alternatively, add one part topsoil, one part potting mix and one part well-decomposed compost, then mix thoroughly. In this case, I like to incorporate some soil at the bottom of the box so there’s a gradual transition between the added material and the natural soil. Steer manure can be used instead of compost, but it should be well decomposed and not have any lumps of fecal matter.
Fill the box right up to the rim and rake level.
WATERING CAN
Now water it. You may be surprised by how much initial water it will need. Gently sprinkle water over the soil until no more soaks through. Leave it for 30 minutes; then repeat the process every 30 minutes. (It will take about four cycles.) Leave it overnight.
The next day, dig into the soil to see how far down the moisture penetrated. If the soil halfway down is still dry, repeat the process of watering and waiting. Eventually, you’ll find that the soil at the bottom is moist but not too wet, which is exactly what you want. The soil level has likely dropped a few inches, which is good. If it has dropped considerably, add more soil mixture until it reaches a few inches below the box’s rim.
BE PATIENT
Getting the soil in the box ready for planting usually takes a few days after the initial fill.
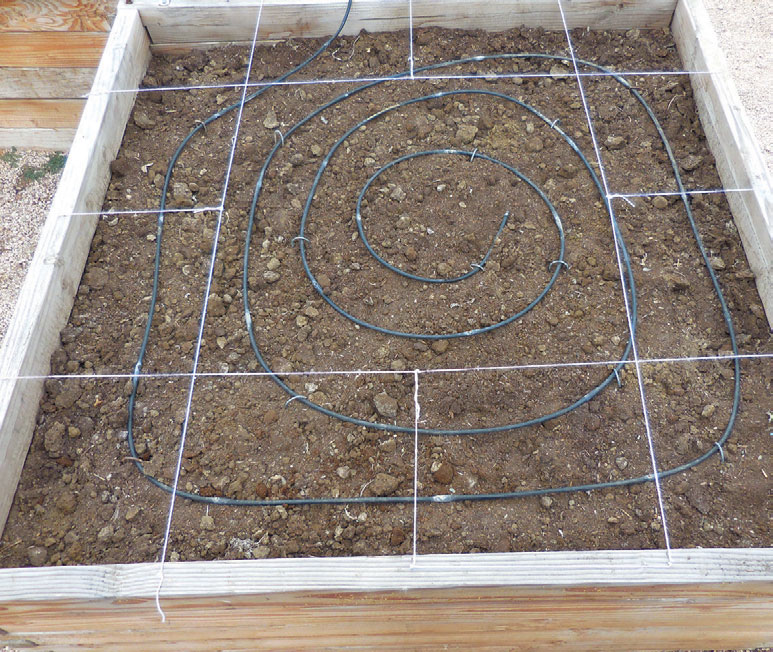
ON YOUR MARK
Make a mark every 12 inches around the square. Drive a nail vertically on the top edge at every mark, leaving half an inch of nail showing. Stretch and tie off string or twine across the box at each nail, creating a grid. Finish hammering the nails flush, so no protrusions are left. For climbing plants such as pole beans or cucumbers, construct a trellis along one side of the box.
PLANT
The first step is deciding what to plant and knowing how much room each requires.
Each square can accommodate:
16 carrots, radishes or green onions
8 peas, green beans, beets or spinach
4 lettuce, kohlrabi or onions
1 broccoli, Brussels sprout, cabbage, cauliflower or pepper
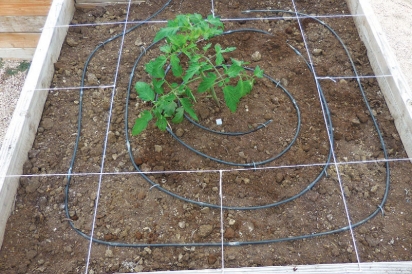
¼ tomato (Tomatoes need four square feet for each plant, unless you grow an indeterminate tomato and prune it to a single stem.)
Place tall plants in the center of the bed to avoid shading others. When sowing seeds, make a small indentation in the soil with the tip of your finger, drop two or three seeds in, cover and pat down to ensure good contact with the soil. Usually, not every seed will germinate. If multiple seeds do, remove the weakest seedling. Leave just one seedling per indention; otherwise, it will become too crowded. Water gently so no seeds wash away.
Remember to keep your box watered, but do not overdo it. Water more frequently during very hot conditions.
BY THE NUMBERS
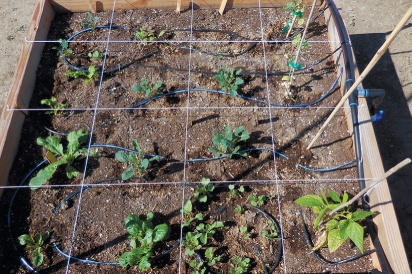
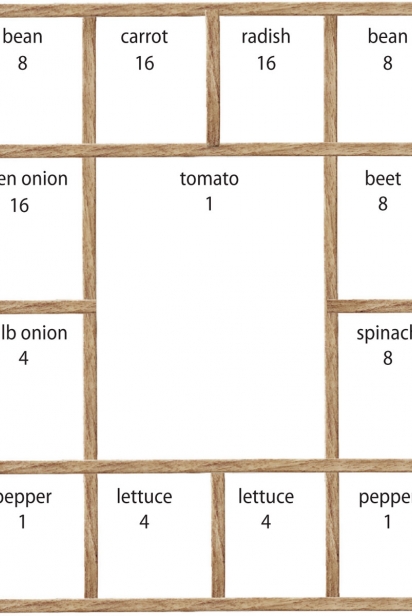
Here is a sample summer garden diagram. Remember, though, the plants listed are only suggestions. Decide what you like to eat and what you want to try. The possibilities are endless.
In the center, plant one tomato seedling, which will require the middle four squares. Put a tomato cage over the young plant to help keep it upright. Plant one pepper in each of two corner squares, and sow eight green beans in the other two corners. Plant four lettuce in each of two squares; eight spinach in one square; eight beets in another square; 16 carrots, radishes and green onions in each of three squares; and, finally, plant four bulb onions in the remaining square. The sample garden square looks like this:
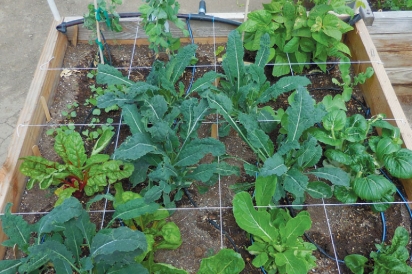
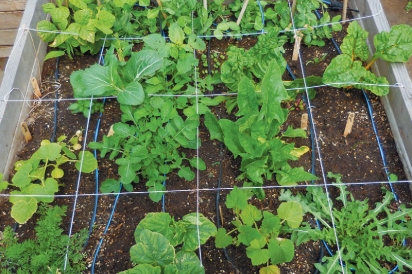
Radishes are the first to mature and become ready to harvest; you can plant a second crop as soon as all the radishes are removed. Tomato and pepper plants grow for the whole season. After you have picked the beans and lettuce plants, consider replacing them with cool season plants such as peas, kohlrabi, cabbage, Brussels sprouts or broccoli. You can also plant a second crop of lettuce, since this is a fairly quick maturing plant that will also grow in cool conditions.
Julian Hoyle is a member of Master Gardeners of Ventura County. Now retired, he oversaw global field crop and vegetable crop seed production operations.